Posts mit dem Label Pastel werden angezeigt. Alle Posts anzeigen

Samstag, 18. Oktober 2014

Essie - Find me an Oasis (US)

I finally treated myself to Essie - Find me an Oasis and I'm really happy with it! It's the US version since I ordered them online, but I actually like this version better. Lackaffen did a lovely comparison between Find me an Oasis US and Europe. I used two very generous coats and the formula isn't great in my opinion, but the color is just adorable. On top is one coat of Sally Hansen - Insta-Dri. 

Essie - Find me an Oasis (US)

Essie - Find me an Oasis (US)

Sonntag, 6. April 2014

Flowers on Essie - Fiji

The recent Essie - Fiji hype made me grab my bottle and paint my nails as well! I own the old european version and not the new limited one though. This one needs three coats to get an opaque result, but I couldn't resist for very long and added some nail art on top. I chose Essie - Turquoise & Caicos plus Essie - Chubby Cheeks to paint on flowers with a nail art brush. On top is one coat of Essence - BTGN High Gloss.


Flowers on Essie - Fiji

Flowers on Essie - Fiji


Flowers on Essie - Fiji

Flowers on Essie - Fiji

Sonntag, 25. November 2012

Pastel & Golden Stripes

Today's design was actually planned as an Aztec design done with the plastic bag method. But after my design was dry and I tried to remove it from the plastic bag, it just didn't work. Fortunately I didn't add the aztec pattern yet so it wasn't that bad, but still a bummer! So I just took all the colors and started to paint the stripes directly onto my nails with a long striping brush (which by the way lost all its bristles in the middle of painting, lucky day!). I used two coats of Essie - Sand Tropez as my base color and then added stripes with Essie - Cute As A Button, Essie - Mint Candy Apple, American Apparel - Summer Peach and Lancome - 012. On top is one coat of Essence BTGN Top Sealer. 


By the way, I'm still working on my design. Did you notice the cute social media buttons on the right? They're not perfect yet (and maybe never will be) because I'm an absolute amateur in webdesign. But they're cute. And they're buttons. :)

Montag, 20. August 2012

Pastel Water Marble with Glitter Accent Nail


After all the recent pastel designs I wanted to do another one, but this time as a water marbling. As always it was pretty difficult to get the water marble how I wanted it to look like. But it seems like I found a way to do it right this weekend and I'm going to show you the result of my experiment this week as well. But for today you need to make do with my first version.


I started with one coat of Essie - Lilacism to get a good base for my water marble, so there wouldn't be any gaps in between my cuticles and the design. For the water marble I used Essie - Lilacism, Mint Candy Apple and Lapis Of Luxury, which is almost invisible on the nail. I added alternately two drops of each color to the distilled water and then dragged the polish with a needle. As you can see, not a single one of my nails looked the same and my ring finger nail was barely covered with the marble. So I decided to get some glitter involved and "dipped" my accent nail into Essence - Glitterastic. One coat of Revlon Quick Dry Top Coat on top and there goes my last random water marble. Stay tuned for the next one! 


Pastel Water Marble


And I'd like to remind you of my Giveaway which is ending on 31th of August. Click here to join and fill in the Rafflecopter form! 
Good Luck!


Furthermore, you might have already noticed that I have updated my page "About Me" and added two new ones "FAQ" and "Video Tutorials". Go check them out if you haven't already and feel free to add more questions and/or give me feedback!
 

Montag, 13. August 2012

Pastel Geometric Nails

Everytime I do pastel nail art I can't resist doing pastel skittle nails, especially since now I have the perfect colors to do so in my collection. You might already have stumbled upon some of my pastel designs through the months and today it is time for another one. 


I decided to pimp my pastel rainbow with some geometric shapes. For this one I used the same colors as in my Pastel Watercolor Nails: China Glaze - Re-Fresh Mint, Something Sweet and Lemon Fizz, Manhattan 81c and added Essie - Lilacism to the rainbow. I did the shapes with white acrylic paint and then added a smaller version in the middle with the nail polish color on the right side. 


Well, hello there! :) 

Sonntag, 12. August 2012

Pastel Watercolor Nails

As promised the next version of my watercolor nails, done with a plastic bag just like my first try


I started with Essie - Blanc again to create an even base and then added blobs with the following nail polishes:

China Glaze - Something Sweet
China Glaze - Lemon Fizz
China Glaze - Re-Fresh Mint
Manhattan - 81C


One coat of Revlon Quick Dry Top Coat on top.

Freitag, 20. Juli 2012

Pastel Stripes / Summer Bikini Nails

Today's manicure was inspired by the pattern on one of my bikinis. I used Essie - Blanc as a base and then added the four pastel colors with a nail art brush.


I used China Glaze - Lemon Fizz, China Glaze - Something Sweet, Artdeco - 94 and Essie - Mojito Madness.


Two coats of Revlon Quick Dry Top Coat and it's done!

Montag, 11. Juni 2012

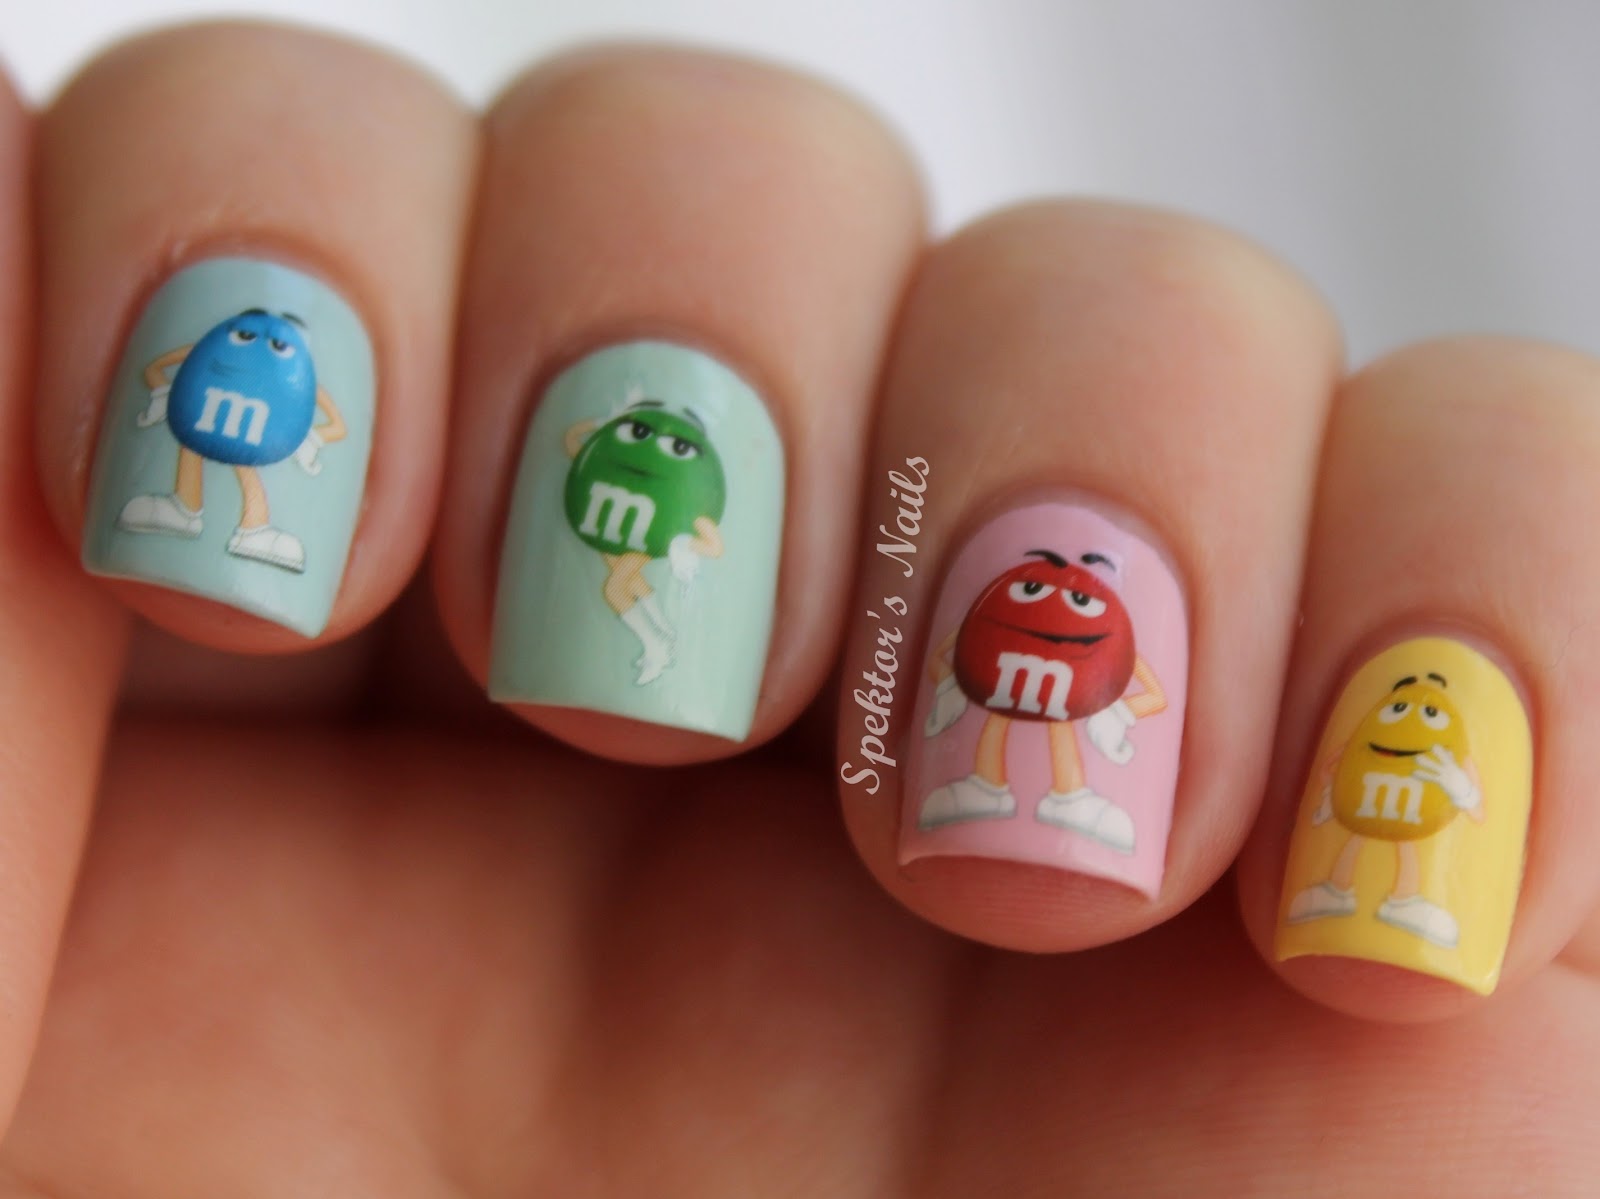
M&M's / Rainbow Nails

M&M's! Yay! 

I've seen those water decals last week at Chez Delaney's and I just had to order them. They're listed as 'HQ Water Decal K157'. 


I decided to put them on a rainbow of pastels, each decal on its pastel twin color. 

From left to right: 

Essence - Speed Of Light Blue 
China Glaze - Re-Fresh Mint
China Glaze - Something Sweet
China Glaze - Lemon Fizz 

I used one coat of Star Nail  - Nail Art Finishing Sealer on top. Application of the decals was flawless!

Donnerstag, 10. Mai 2012

Fancy Pusheen Nails

Do you know Pusheen the cat? If not you should take a look at this website
It's the most cutest cat and a dear friend suggested I should do a Pusheen design. Here you go! 


I used 3 coats of China Glaze - Something Sweet as a base color. I had no problems with drying time and added one coat of Seche Vite on each nail. I think Something Sweet has quite a good formula since I expected otherwise. Pastels are not too great in general and I heard a lot of people complain about this one. But it was the first time I used it, so time will tell if the formula stays good. 


I used a picture from the 'Fancy Pusheen' as a guidance and painted with acrylic paint. This was the first time I used acrylic paint for nail art and I think it's awesome! It works much better and dries very quickly. And you can mix your own colors, no need to search through your nail polish collection for the perfect color! 


I used the usual nail art/painting brushes I have at home but I might get some more brushes to build up a good selection. 


Thanks for reading! <3

Dienstag, 31. Januar 2012

NOTD: Pastel Splatter Nails / DIY Nail Decals

Remember how I said I'm never gonna do splatter nails again? Well, problem solved! I did it again and it was much more enjoyable this time! I tried the so called Plastic Bag Method, where you paint the nail polish onto a plastic bag and let it dry for a few hours (to be safe: over night). 


When your design is completely dry, you can pull it off the bag gently and stick it onto your almost freshly applied base color. Cleaning up was much easier than with my first attempt, since you can almost scratch off all the excessive parts. Add top coat and you're done!


Splatter Nails with my favorite coffee mug ;)


I used the following colors:
OPI - Alpine Snow (Base)
Essie - Mint Candy Apple
Catrice - Sweets For My Sweets
Artdeco - 95
Artdeco - 93